Sensor deployment and upload (without relay).
How to deploy a sensor using the FIDO smart app.
Written By Gareth Lloyd
Deploying sensor
If you are working on a ‘lift and shift’ style project, you will not have a relay unit. When deploying a sensor on its own, once your app is open, you need to tap on ‘actions’ at the bottom of the map screen, then tap on ‘Deploy a sensor’.
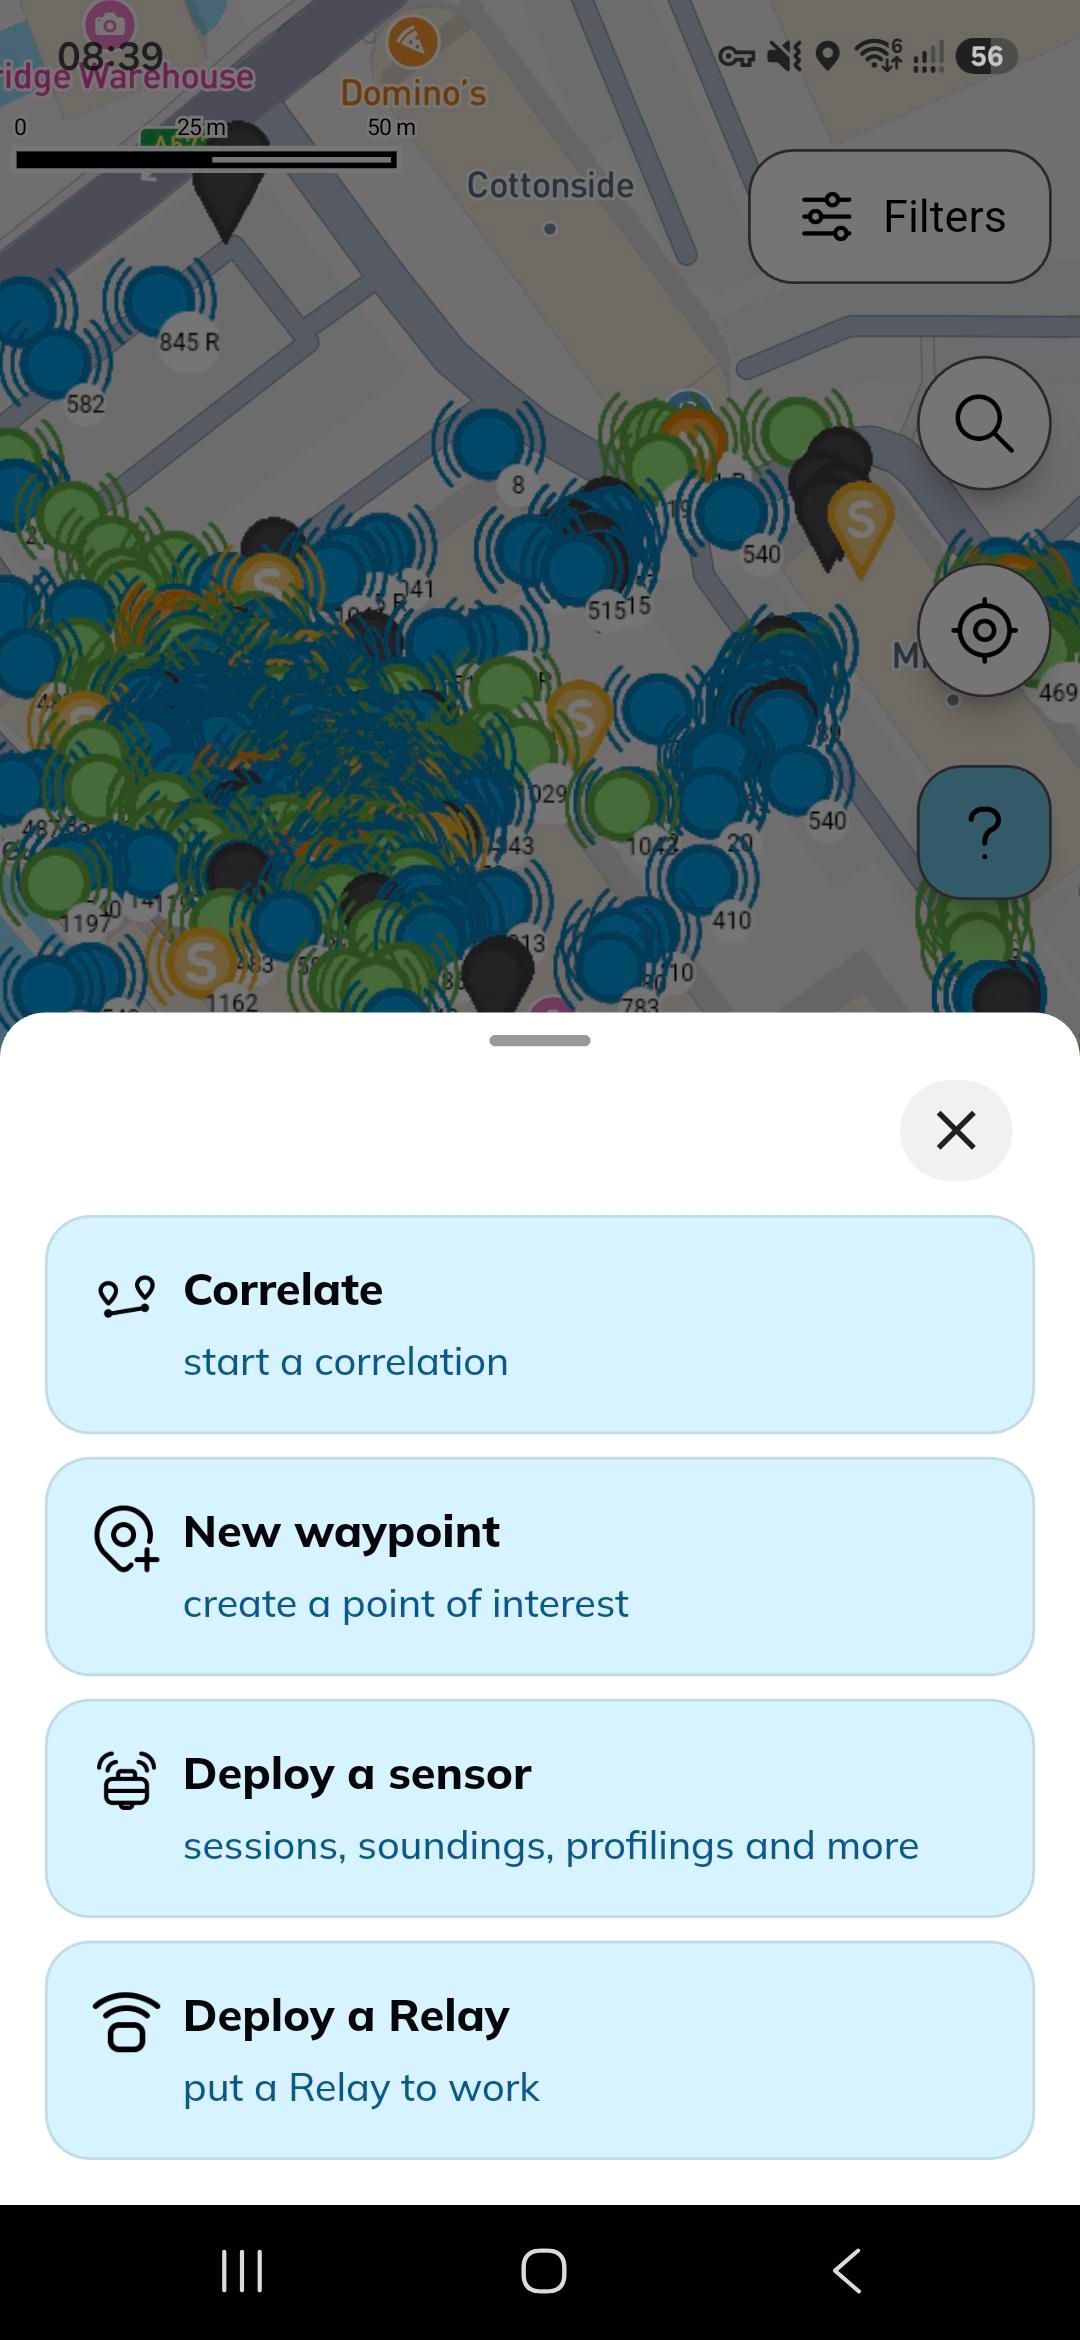
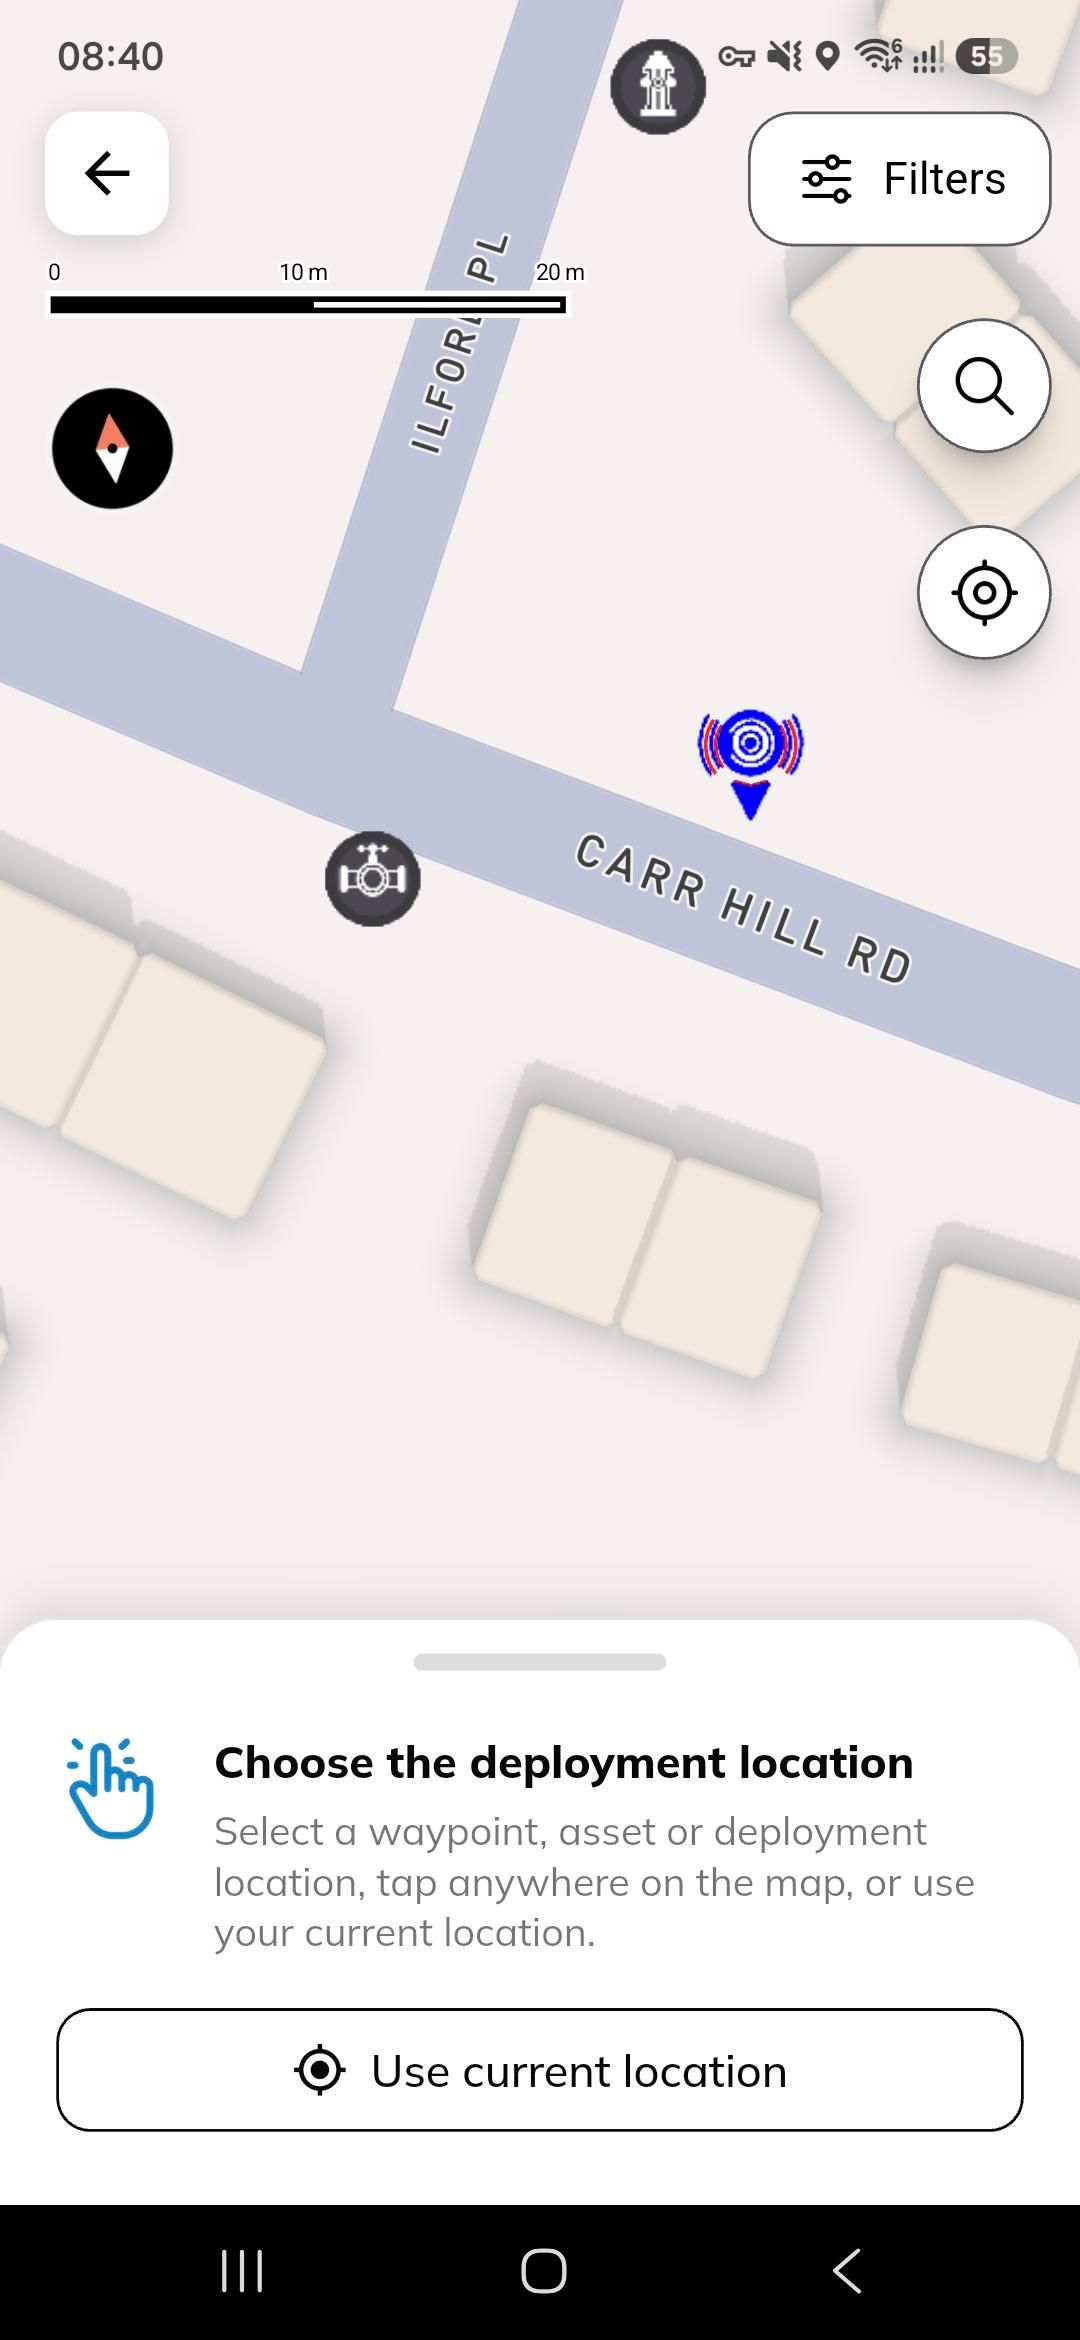
A map will load with any assets and ODLs in the area (If you are working with ODLs then you must go on the filters and make sure ODLs are toggled on), you have 3 ways of deploying the sensor.
1. Select an ODL and tap ‘Deploy a sensor here’
2. Select an asset and tap ‘Deploy a sensor here’
3. Tap on the map in the location you wish to place the sensor and tap ‘Deploy a sensor here’
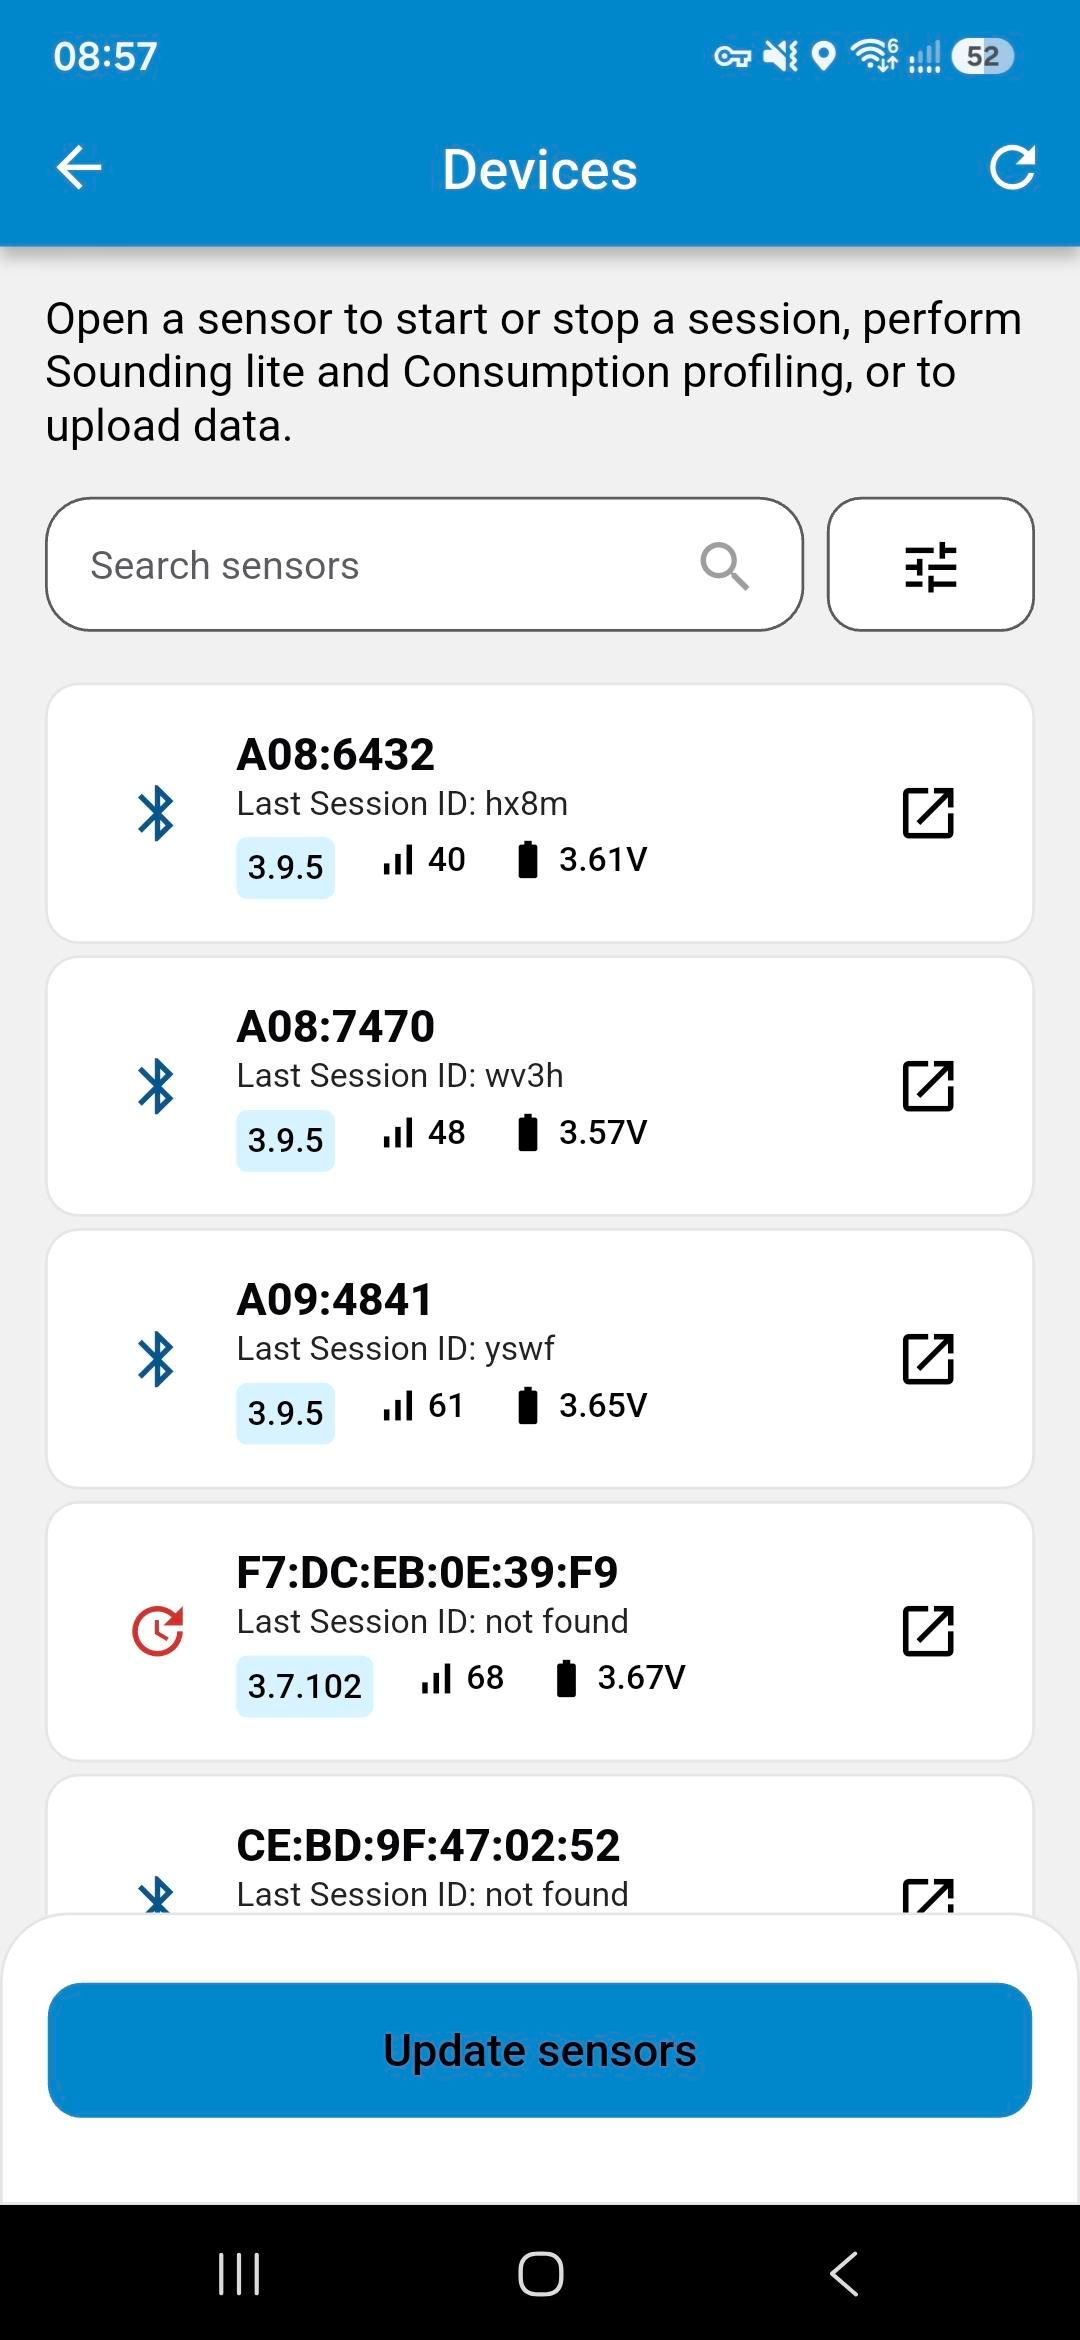
Once you have chosen where you want to deploy, you will be taken to the sensor selection page. If you have a specific sensor you wish to deploy you can search for the sensor by typing the sensor ID into the search bar, alternatively, tap the filter icon and use the side scrolling bar to reduce the Bluetooth search area.
When you have found the sensor you wish to use, tap on it, the sensors LED will turn green and the app will open the sensor page where you will see the sensors ID, what firmware version is on the sensor, the status of the sensor (if the sensor already has a session running it will tell you here, if not it will show as inactive) and the bluetooth signal strength.
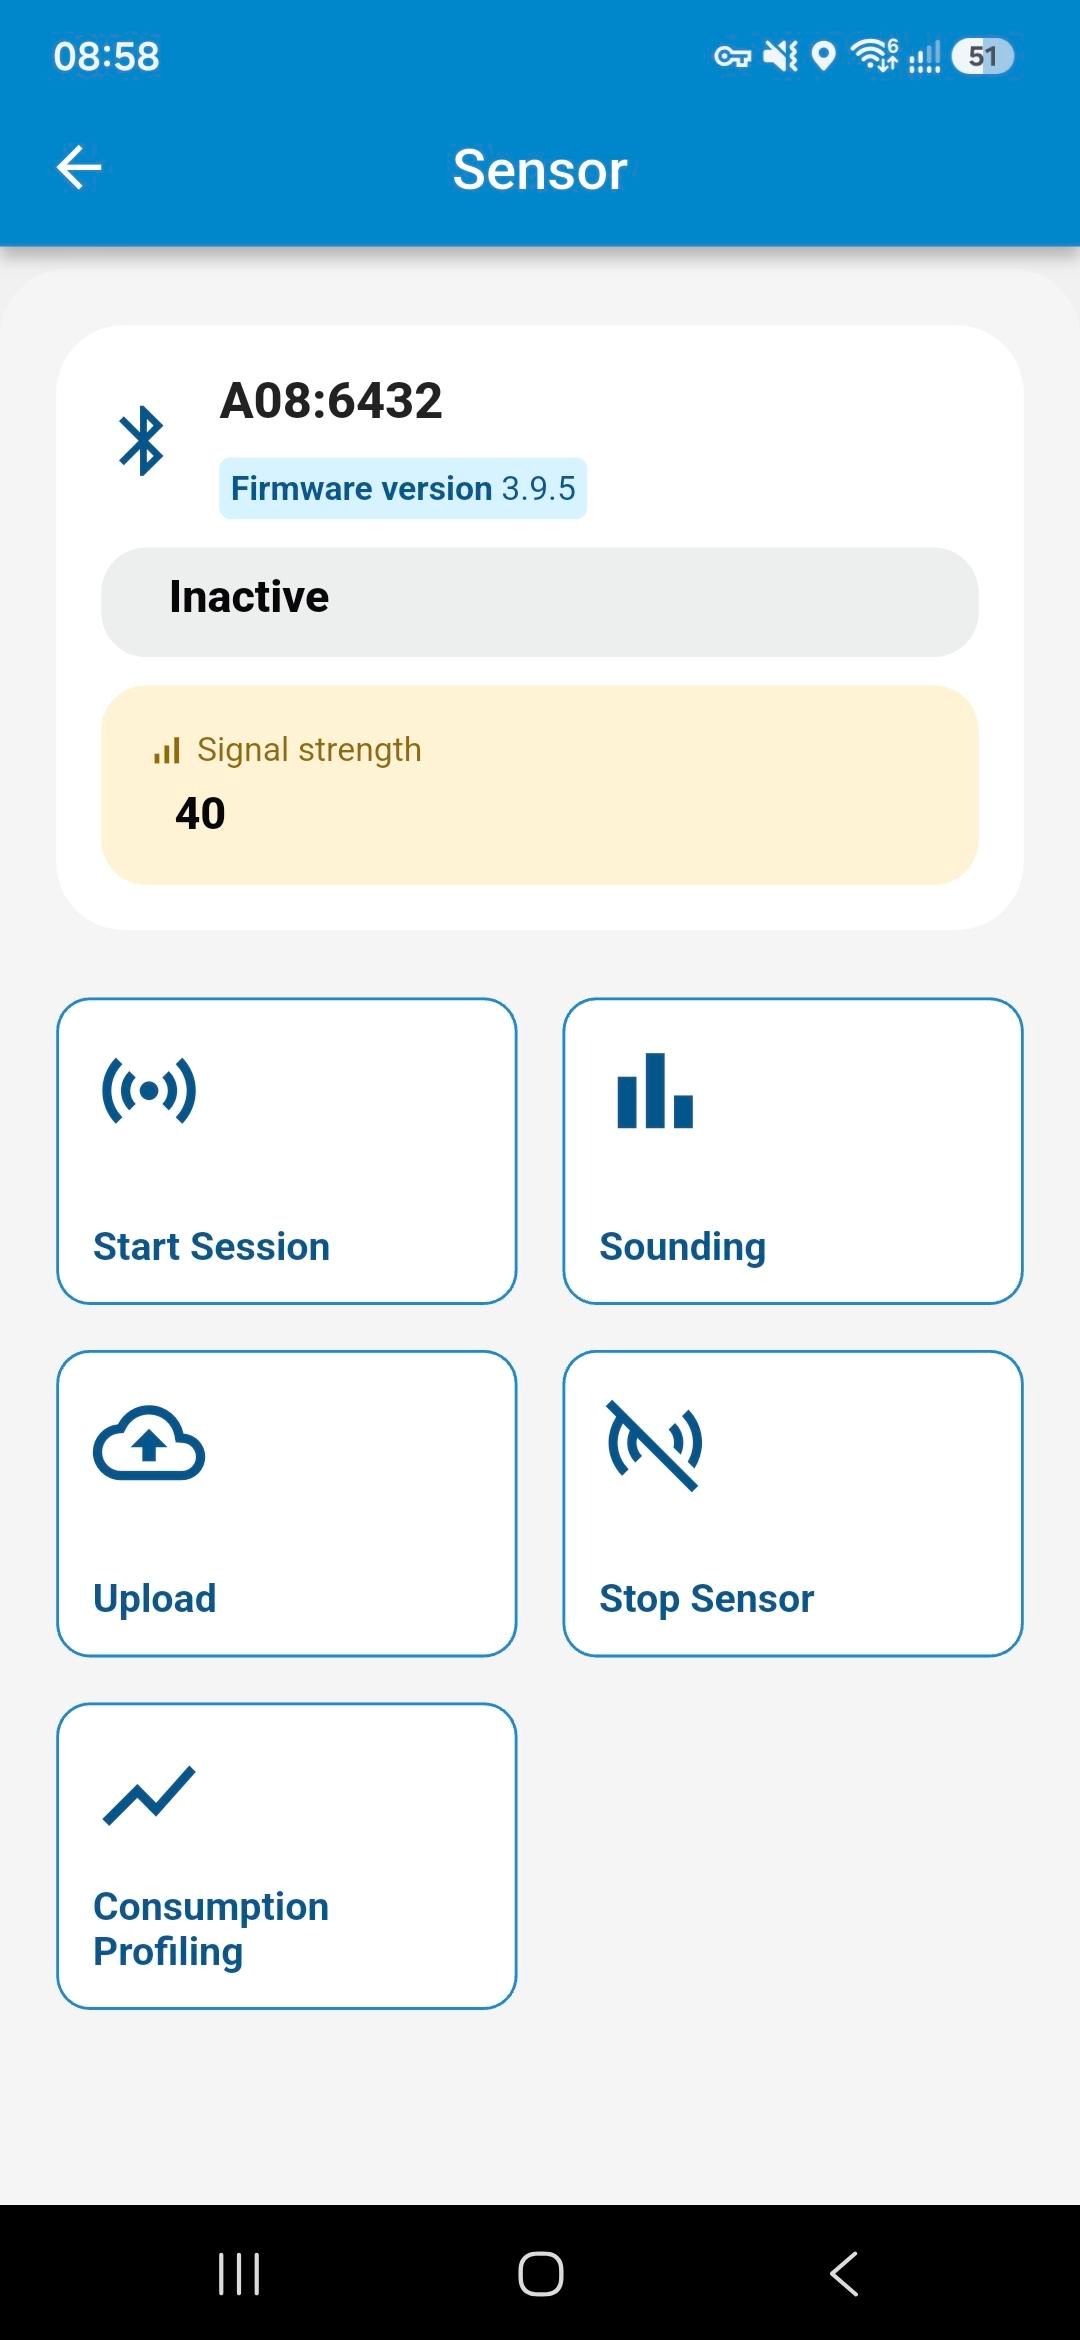
Tap on ‘Start Session’, you are then prompted to select a sensor mode from a drop-down menu. Here you are able to select from the following modes
· System mode
· 5-minute
· 30-minute
· 1-hour
· Overnight
· 24-hours
(please see the following article for further details regarding each session type Choosing a Sampling Session - FIDO Tech)
When carrying out a ‘lift and shift’ style project you will want to place the sensor out in ‘system mode’. Make sure system mode is selected, and tap ‘confirm’.
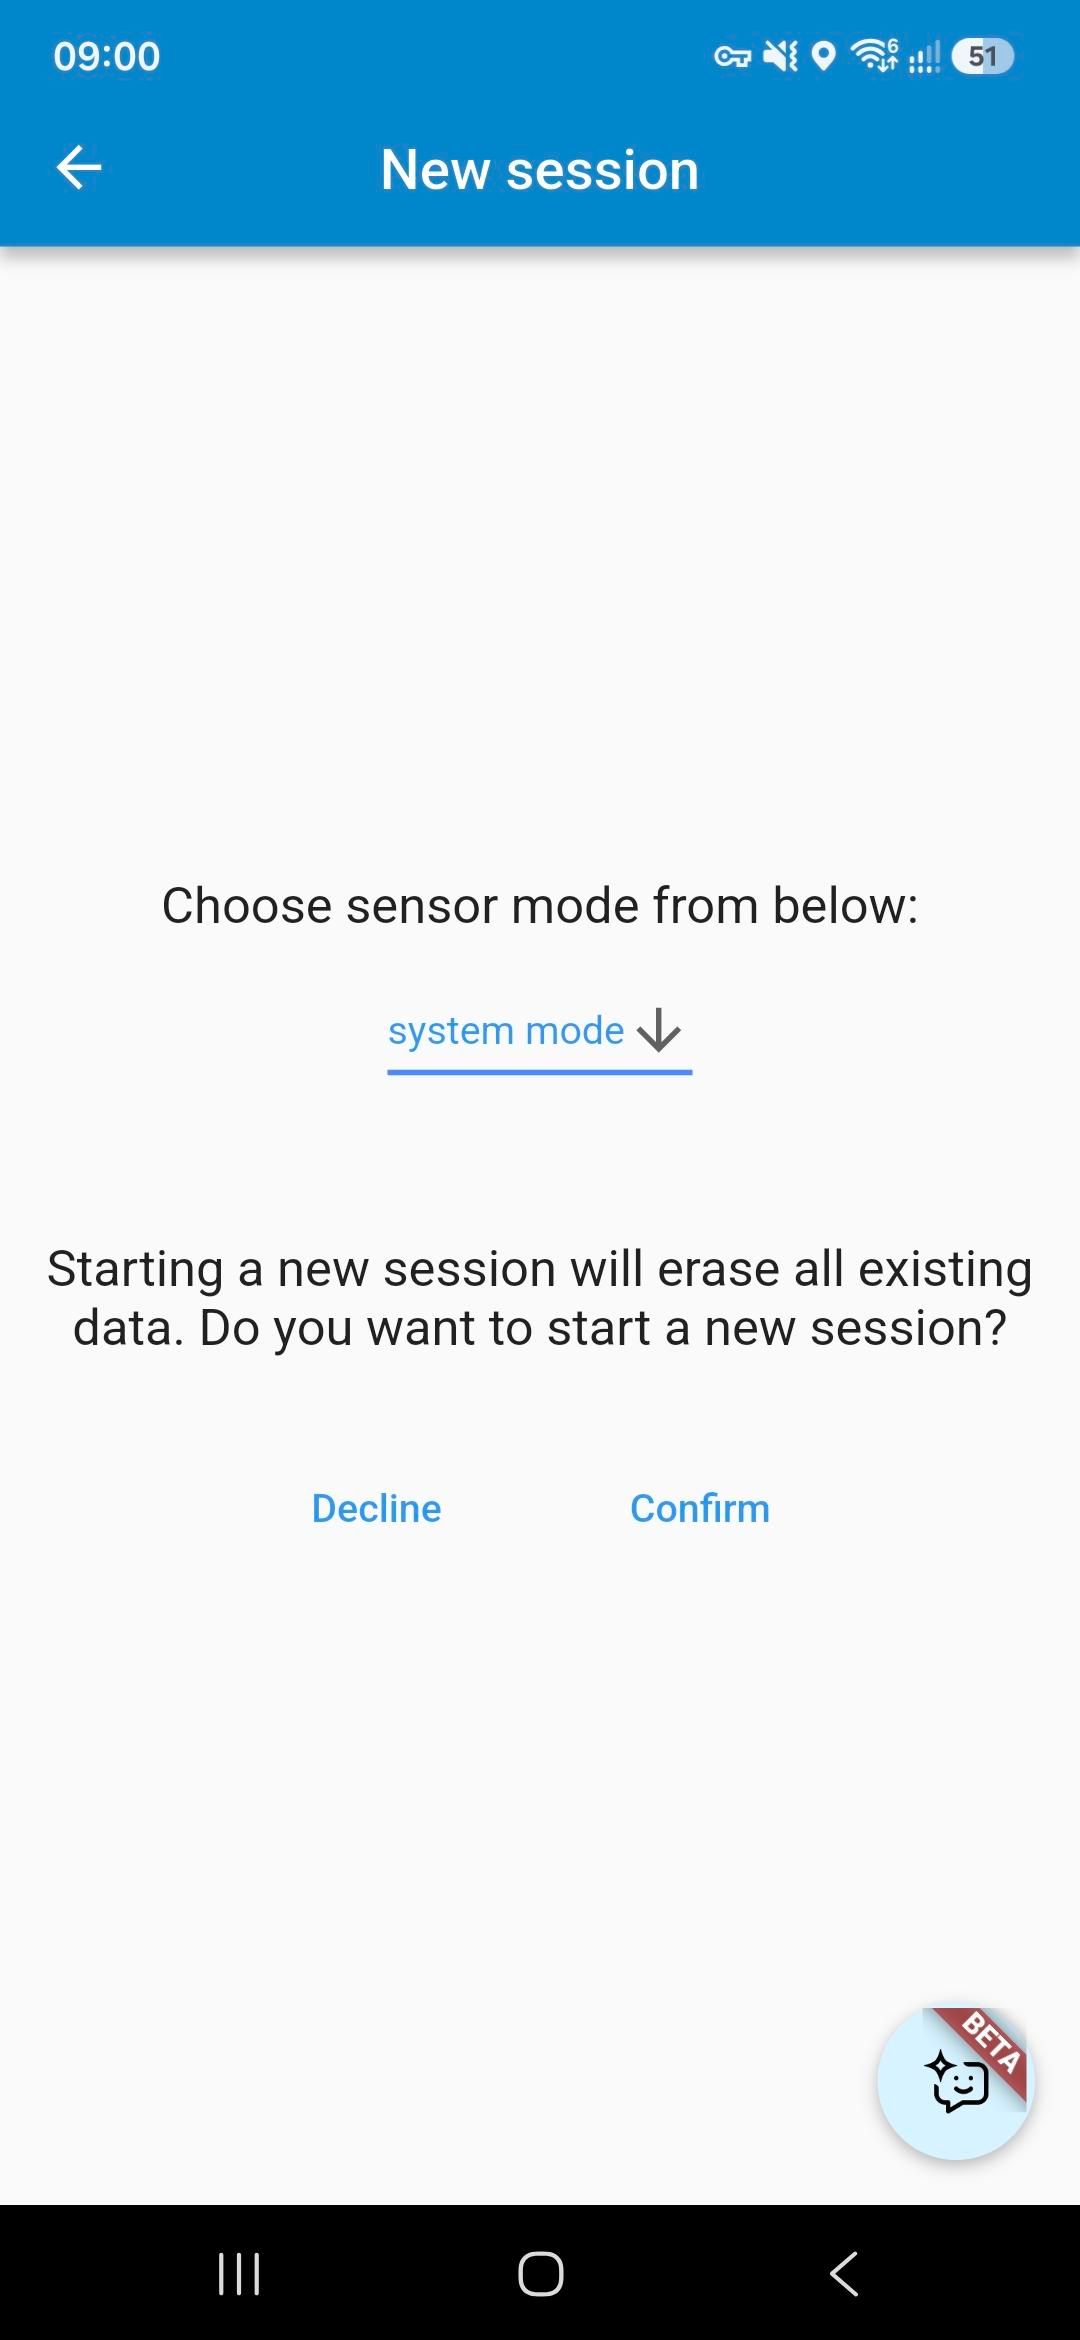
You will notice the light on the sensor will turn purple, this confirms that the sensor has started the session. On the app you will be given all the details about that session. We recommend that photos are added to the session at this point, this provides proof that the sensor is deployed correctly as well as helping other engineers to locate the asset in future.
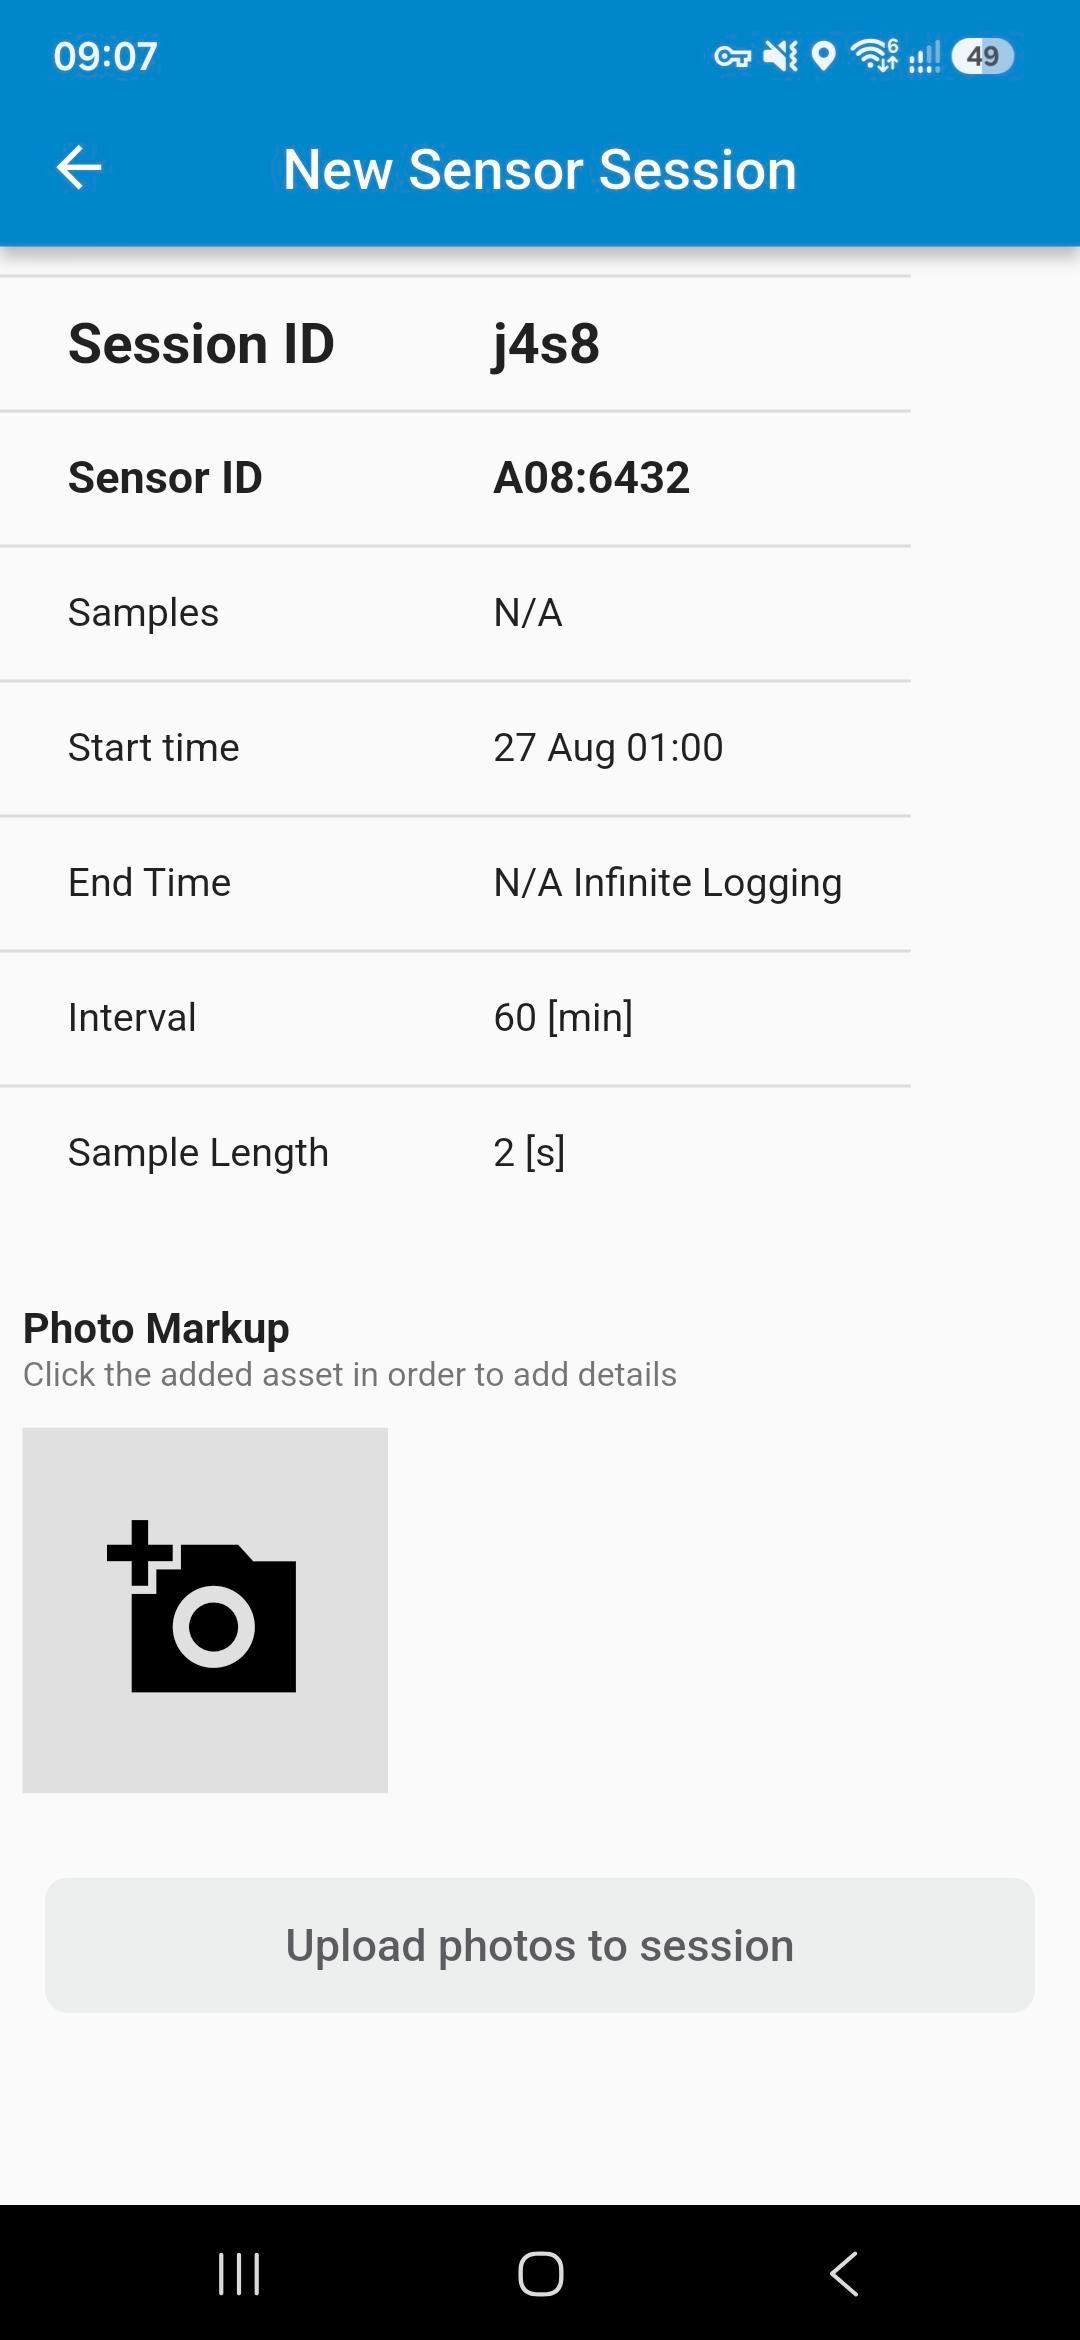
Once you have taken the photos, tap on ‘upload photos to session’ (if you have not taken any photos then just press the back arrow in the top left corner) you will be taken back to the sensor selection page, you will notice that the sensor you used will now have a rocket icon next to it and will show as being in system mode. Press the back arrow and will be taken back to the map screen, at which point you can move on to the next location!
Uploading sensor
To upload the sensor, first you need to collect the sensor in. Once you have the sensor, tap on ‘Devices’ in the bottom left corner of the map screen. The sensor selection page will open. The sensor you have just collected will appear with a memory card icon next to the sensor ID.
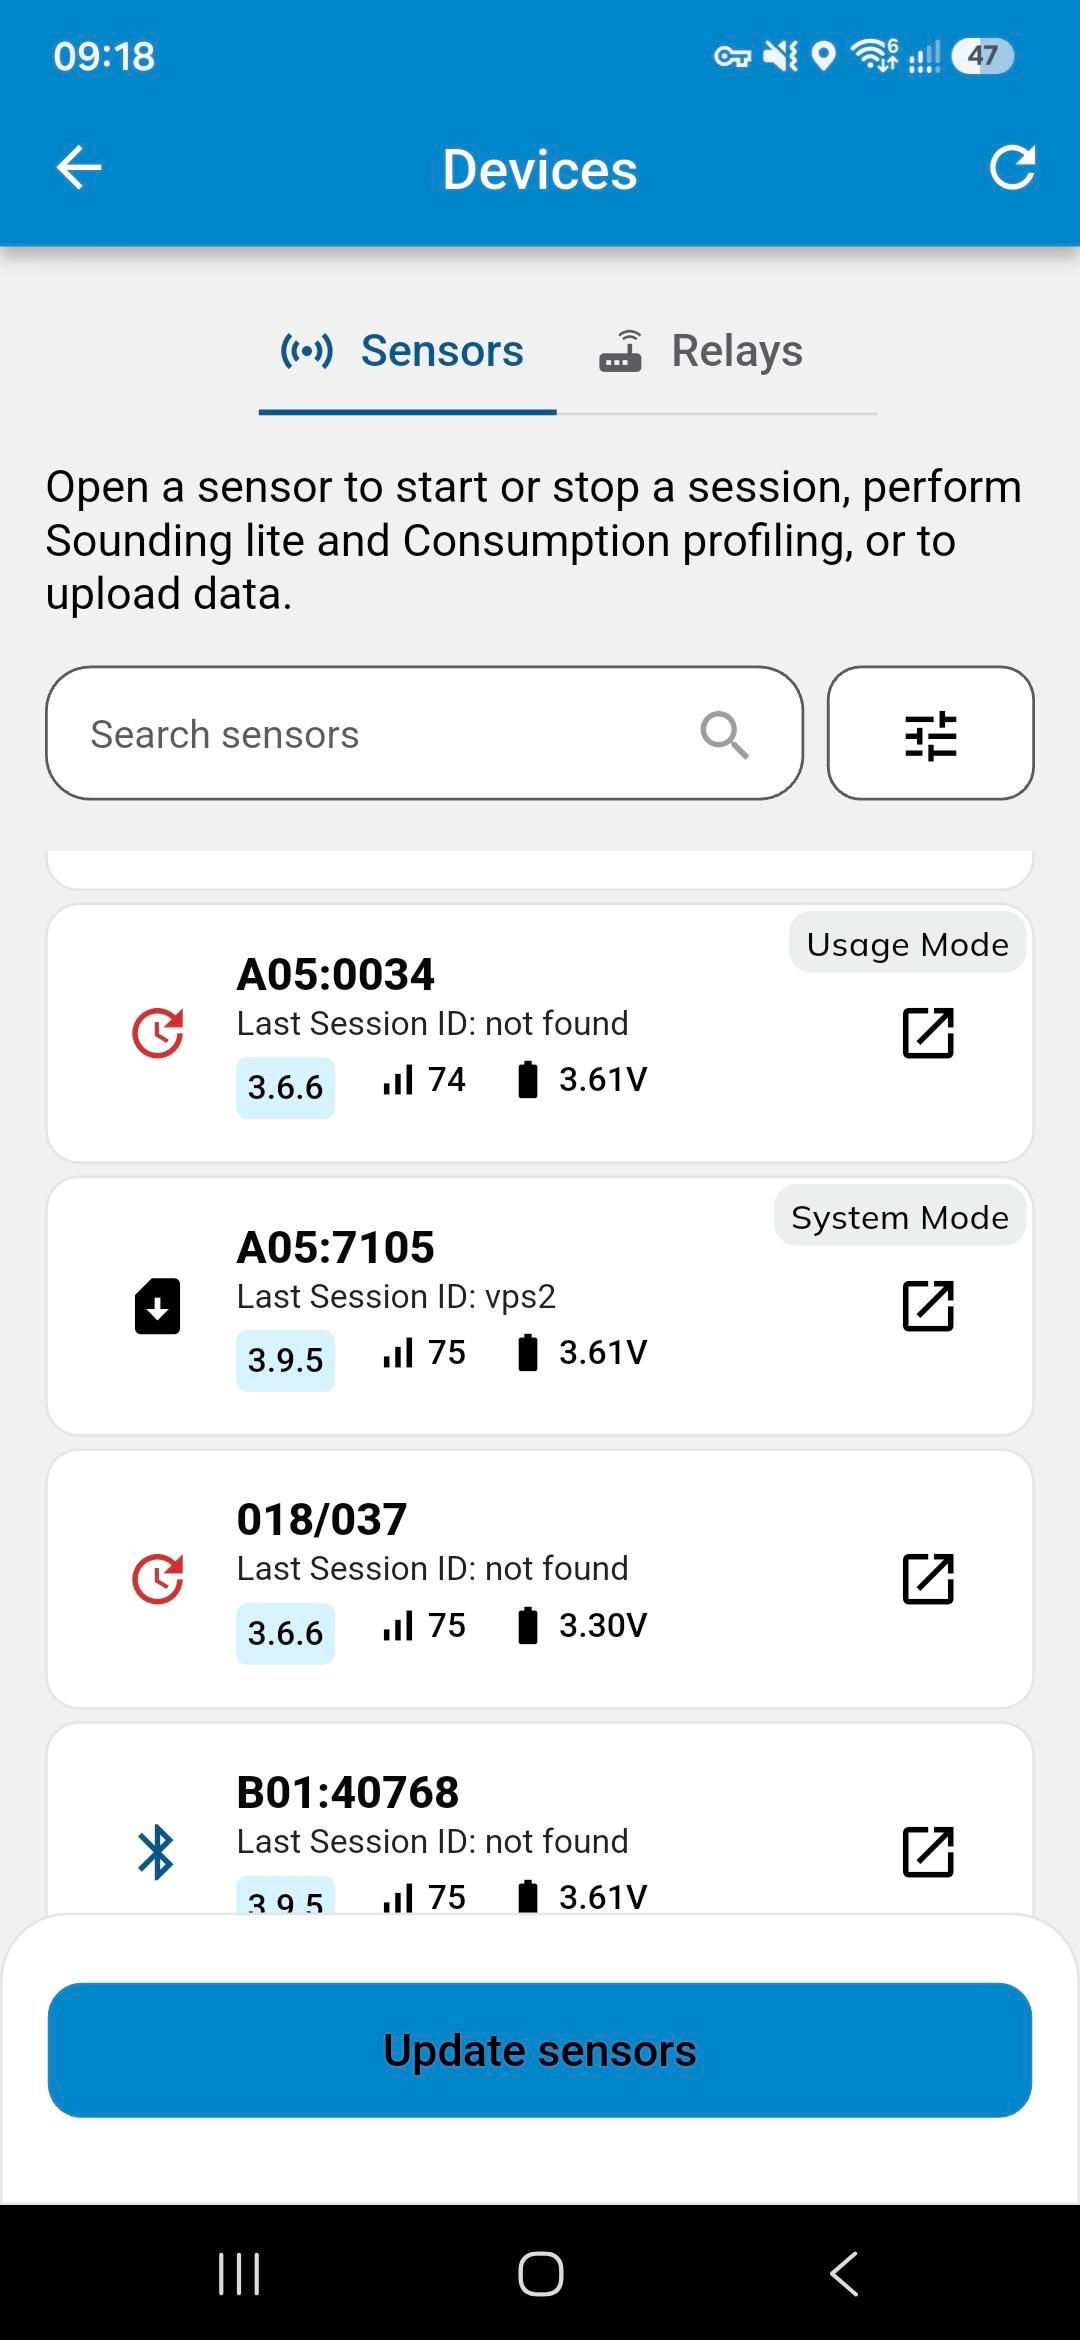
Tap on the sensor you wish to upload, once you tap on the sensor the data will automatically upload and you will see two graphs (so long as you have ‘Display Session Graph After Upload’ toggled on in your profile section in the app) one will show you the quietest recording from each night for up to 9 nights, the second graph will show you each of the 5 recordings from the previous night. If you scroll down, you will also see a leak inference confidence rating.
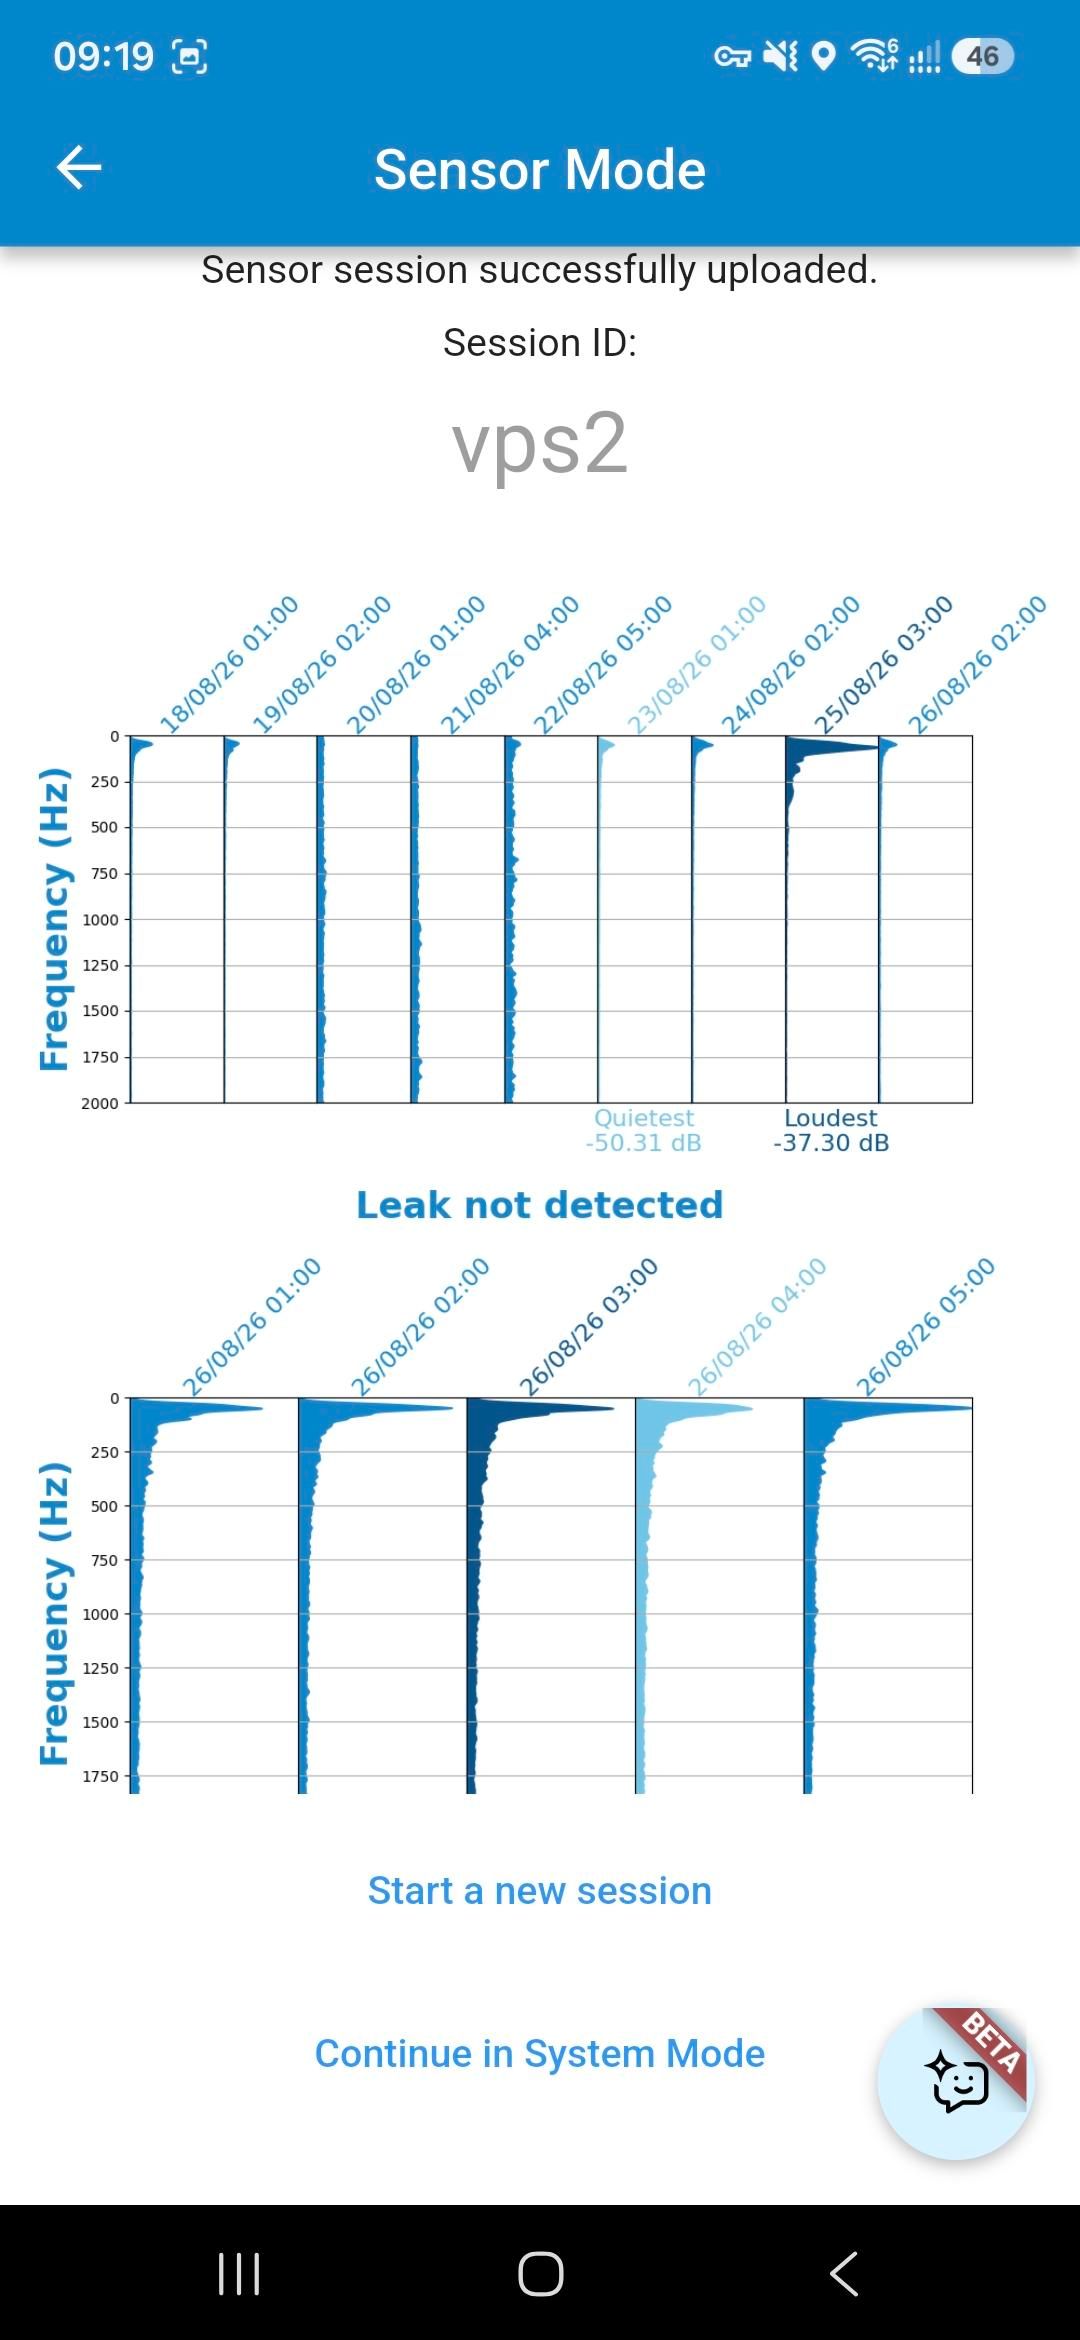
Tap on the back arrow in the top left corner, this will take you back to the sensor page, if you are leaving the sensor in this location to gather more data then just tap the back arrow again and place the sensor back on the asset, if you are collecting the sensor to move on to the next location then tap on ‘Stop Sensor’. This will end the session and the sensor will be ready to deploy on the next location!